Haali Dss2 Installer Youtube En
Mar 25, 2018 - Haali Dss2 Installer Youtube. Dvdvideosoft Free Youtube Mp3 Converter Serial Marshall As50d Acoustic Guitar Amplifier Manual Tabledit. Feb 27, 2018 - Haali Dss2 Installer Youtube Pc. Download and install, run it, let it update all the things it wants to. Facebook Twitter LinkedIn YouTube.
Sections: • • • • • • • Introduction: Many modern TVs now include an extra frames feature, usually either 120Hz or 240Hz. This just means they take the source video, which is usually between 24-30FPS, and add new, interpolated frames between the original frames that make the motion look much more smooth. High framerate (HFR at 48fps) was used in The Hobbit and will be used in upcoming films like the Avatar sequels, so why not watch all your movies at higher framerates? A lot of people don’t realize this, but 99% of TVs made before this feature was introduced are actually capable of displaying 50FPS and 60FPS, and of course most LCD monitors display 60FPS as well. This tutorial will allow you to convert videos of any framerate to higher framerates; 25FPS becomes 50FPS and 24/30FPS becomes 60FPS by default, or you can specify whichever framerate you want. This script offers greater quality than any televisions I have seen. I’m sure many people will want to see how well this script works, so here’s a comparison: Note: This can now be done in realtime using!
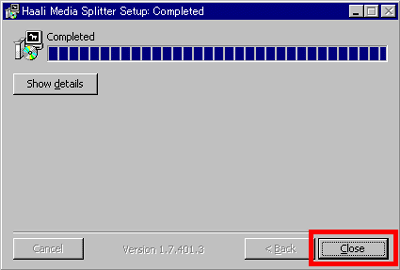
Purpose: This post provides instructions on how to easily convert any video to 60FPS, which allows you to take advantage of this feature of modern TVs on your computer monitor or TV without actually buying anything. Step 1: The files needed for this step are found in (~3MB). Run and install the file AviSynth.exe. It is an early version of AviSynth 2.6 that is more stable and faster for multithreading than 2.5 releases. Download and install, run it, let it update all the things it wants to and import all of the presets.
Optional Tip: If you want MeGUI to update to the very latest stuff (at your own risk) you can push ctrl+s, go to the Extra Configuration tab, and in the Auto Update section select “Use development update server” Close MeGUI and extract the files in the tools folder from our zip file into your MeGUI tools folder, which for most people will be either C: Program Files (x86) MeGUI tools or C: Program Files MeGUI tools. Step 2: Download and install. When that is installed, run MKVMerge (Start Menu -> All Programs -> MKVToolnix -> mkvmerge GUI).
You will also need codecs installed. If you don’t already have them I recommend. If you install K-Lite, make sure to select “ Profile 9: Lots of Stuff” during installation. Step 3: Start MeGUI again. You should be left with a window that looks similar to this: Step 4: Push ctrl+r, or go to Tools -> AVS Script Creator. Now you should see something like this: Step 5: Click the Config button next to Avisynth profile. It should look like this: Step 6: Click the New button down the bottom and type 60FPS in the name box, so it should look like this: Step 7: Now for the script that will do the actual 60FPS conversion.
Zuma revenge crack keygen pes. Zuma’s Revenge. Reflexive Arcade Zuma’s Revenge by VladTheImpaler.zip. 106 records On this page download now zuma crack, serial or keygen.
Just copy and paste the following code into the text input area. Cores=4 SetMemoryMax(512) SetMTMode(3,Cores) PluginPath = 'C: Program Files (x86) MeGUI tools avisynth_plugin ' LoadPlugin(PluginPath+'svpflow1.dll') LoadPlugin(PluginPath+'svpflow2.dll') Import(PluginPath+'InterFrame2.avsi').ConvertToYV12() SetMTMode(2) InterFrame(Cores=Cores) Important note #1: Make sure the path on the third line is correct. For example, if you are running 32-bit Windows, you will need to modify the path to “Program Files” instead. Important note #2: You should change the number “4” in the script (on line 1) to your number of CPU cores. If you don’t know how many cores your CPU has just Google your CPU and you should be able to find the specs somewhere, or 4 should be fine anyway. Important note #3: If you have a video card, you can improve quality by adding “GPU=true” to the script. However, it may make encoding time slower, so take that into account.
So InterFrame(Cores=Cores) would turn into InterFrame(Cores=Cores, GPU=true) If you do this, you may also need to go into your MeGUI tools folder (usually C: Program Files (x86) MeGUI tools x264) and rename the file opencl.dll to opencl.dll.bak. This will let MeGUI use the version of opencl.dll that your video card drivers have installed, instead of the generic one from MeGUI. Important note #4: This script always outputs either 50FPS or 59.94FPS (60FPS) for compatibility reasons. If you want to always double the framerate instead, so that for example 23.976FPS turns into 47.952FPS (48FPS), you can use the “FrameDouble” parameter. So InterFrame(Cores=Cores) would turn into InterFrame(Cores=Cores, FrameDouble=true) So now your window should look similar to this (with different text): Step 8: Click the Extra Setup tab and make sure “Prefer DSS2 over DirectShowSource” is checked.

Optional tip #1: You might also want to choose your preferred resizer. For aspect-ratio changes (like from 720×576 to 720×480) a neutral filter like Spline36 will be nice. For actual resizing (like from 1920×1080 to 1280×720) a sharp filter like Spline64 will be best. I usually just leave it on Spline36. Make sure to untick the checkbox on the option after you change the default resizer, otherwise it will always be used by default which is often unnecessary. Optional tip #2: I recommend changing the “MOD value used for resizing” to mod4.